Using ShareX as a Snipping Tool on Windows
How to make ShareX behave like a fast snipping tool, including taking over the Print Screen key.
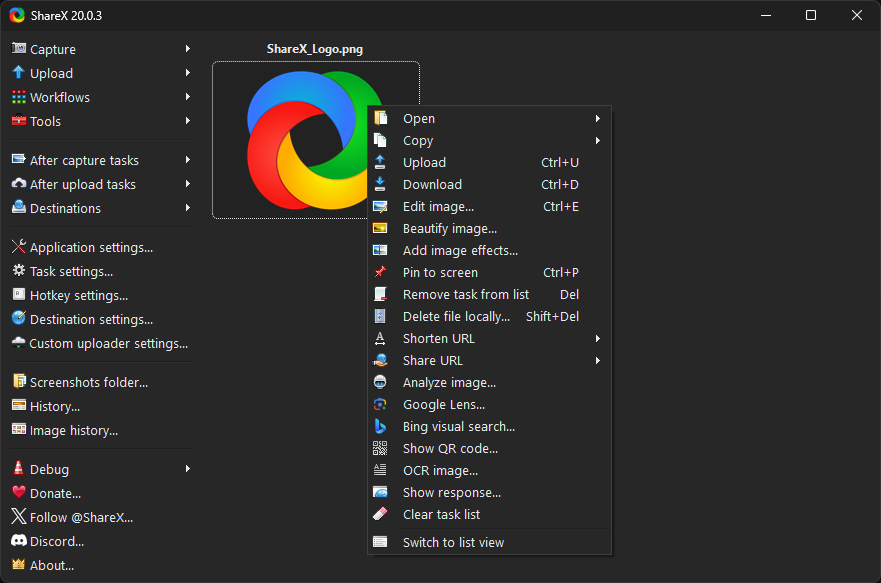
ShareX offers robust screen capture capabilities that can fully replace and enhance the functionality of traditional snipping tools on Windows. Whether you need to quickly grab a portion of your screen, an active window, or even a scrolling webpage, ShareX provides flexible options and powerful features. It’s a free and open-source application designed to streamline your workflow for capturing, annotating, and sharing screen content. This guide will walk you through how to use ShareX effectively as your primary snipping tool, from basic capture to advanced features that can significantly boost your productivity. You'll learn how to configure ShareX for quick snips, utilize various capture modes, and leverage its built-in editor and history functions.
What People Mean by a Snipping Tool
When people refer to a "snipping tool," they generally mean an application that allows them to select and capture a specific part of their computer screen, rather than the entire display. This often involves drawing a rectangle around the desired area, capturing an individual window, or even a freehand shape. The captured image, often called a "snip" or "screenshot," is then typically copied to the clipboard, saved as a file, or opened in an editor for further annotation. The goal is usually to quickly grab visual information for sharing, documentation, or personal reference. ShareX excels at these core functions and extends them with a wide array of additional features, making it a powerful alternative for anyone looking for a comprehensive
a full ShareX vs Snipping Tool comparison.
Set ShareX to Snip with One Key
One of the most efficient ways to use ShareX as a snipping tool is to configure a hotkey for instant screen capture. This allows you to trigger a snip with a single key press, without needing to open the ShareX main window first. To set up a hotkey for region capture:
- Open the ShareX main window.
- Click on Hotkey settings in the left-hand menu.
- In the Hotkey settings window, you will see a list of predefined hotkeys and actions. If you don't see an entry for "Capture region," click the Add button at the bottom of the window.
- A new empty hotkey entry will appear. Click the "None" text under the "Hotkey" column and press your desired key combination (e.g., Print Screen, Ctrl+Shift+C).
- Under the "Task" column, click "None" and select Capture > Capture region from the context menu.
- (Optional) In the "After capture tasks" column, you can configure actions to happen immediately after the snip, such as "Copy image to clipboard" or "Save image to file." Ensure at least one of these is selected if you want to use your snip.
- Close the Hotkey settings window. Your changes are automatically saved.
Now, whenever you press your configured hotkey, ShareX will activate the region capture tool, allowing you to draw a rectangle around the area you want to snip. For more details on configuring your capture hotkeys, refer to our guide on
screenshot shortcut setup.
Snip Modes: Rectangle, Window, Freehand, and Last Region
ShareX offers several versatile capture modes, giving you precise control over what you snip from your screen. These modes are accessible from the main window's
Capturemenu, or directly via hotkeys you configure in the
Hotkey settings.
Rectangle Region Snip
This is the most common and versatile snipping method. When you activate "Capture region," your screen will dim, and a crosshair cursor will appear. Click and drag your mouse to draw a rectangular selection box around the area you wish to snip. Release the mouse button to finalize the snip. ShareX provides various options during region capture, such as pixel-perfect selection, magnifying glass for precision, and the ability to resize or move the selection before capturing. This is the primary way to use ShareX as a snipping tool. For a full breakdown of options available during this capture type, see our
region capture reference.
Window Snip
This mode allows you to snip an entire window with a single click.
- From the Capture menu, select Capture window.
- Your cursor will change, and as you hover over different windows, they will be highlighted.
- Click on the window you wish to snip. ShareX will capture the entire content of that window, including its title bar and borders.
This is particularly useful for capturing application interfaces or dialog boxes without needing to manually draw a rectangle.
Freehand Region Snip
For irregular shapes, the freehand region snip is invaluable.
- From the Capture menu, select Capture freehand region.
- Your cursor will change. Click and hold the mouse button, then draw any shape you desire on the screen.
- Release the mouse button to complete the snip. The area within your drawn shape will be captured.
This mode is less common for general snipping but can be very useful for specific graphic design or annotation tasks.
Last Region Snip
If you frequently snip the same area of your screen, the "Capture last region" feature is a significant time-saver.
- After performing a "Capture region" snip, ShareX remembers the exact dimensions and position of that capture.
- The next time you want to snip that identical area, select Capture last region from the Capture menu or use its dedicated hotkey.
ShareX will automatically snip the exact same area without requiring you to redraw the selection. This is incredibly efficient for repetitive tasks, such as capturing frames from a video or specific elements of a web page that remain in a fixed position. For a comprehensive overview of all available capture methods, including scrolling capture and monitor capture, consult our guide on
ShareX screenshot modes.
Annotate and Copy in the Same Motion
ShareX integrates annotation and copying into a seamless workflow, making it incredibly efficient for a snipping tool. After you take a snip, ShareX can automatically open its powerful image editor and copy the result to your clipboard, all without extra clicks.
Automatic Editor and Clipboard Copy
To configure ShareX to automatically open the editor and copy to the clipboard after every snip:
- Open the ShareX main window.
- Click on Task settings in the left-hand menu.
- Navigate to the After capture tasks tab.
- Ensure the following options are checked:
- Open image in editor: This will automatically launch the ShareX image editor with your snip.
- Copy image to clipboard: This will place the captured image onto your clipboard, ready to be pasted into any application.
- (Optional) You can also check "Save image to file" if you want to automatically save every snip to a designated folder.
With these settings, after you perform a snip using any of the capture modes, the image editor will open, allowing you to immediately add annotations, and the image will already be on your clipboard.
Using the Image Editor
The ShareX image editor provides a rich set of tools for annotating your snips:
- Drawing tools: Use lines, arrows, rectangles, ellipses, and freehand drawing to highlight areas.
- Text tools: Add text boxes to provide explanations or labels. You can customize font, size, and color.
- Blur/Pixelate: Obscure sensitive information like email addresses or personal data.
- Highlight: Draw transparent shapes over text or areas to make them stand out.
- Step tool: Automatically number steps in a process or elements in an image.
- Stickers and Image Watermarks: Add predefined shapes or custom images.
Once you're done annotating, you have several options within the editor:
- Apply changes: Click the checkmark icon to apply the annotations and close the editor. The edited image will then be copied to the clipboard (if configured in after-capture tasks) and saved (if configured).
- Save As: Use the disk icon to save the image with a new name or in a different format.
- Upload: If you have image upload destinations configured, you can upload the edited snip directly from the editor.
This integrated workflow significantly speeds up the process of capturing, annotating, and sharing visual information.
Snip History and Re-Finding Old Snips
ShareX keeps a detailed record of all your snips, making it easy to revisit, re-edit, or re-upload past captures. This "History" feature is a significant advantage over basic snipping tools that might only store the last snip in the clipboard.
Accessing Your History
To view your snip history:
- Open the ShareX main window.
- Click on History in the left-hand menu.
The History window displays a list of your past captures, typically sorted by date and time. Each entry includes a thumbnail, the capture time, and sometimes details about the actions performed (e.g., "Copied to clipboard," "Uploaded to Imgur").
Searching and Filtering History
If you have a large number of snips, finding a specific one can be challenging. ShareX provides tools to help:
- Search bar: At the top of the History window, you can type keywords to search for snips. ShareX searches metadata associated with the snip, such as the window title it was captured from or any custom names you gave it.
- Date range filter: You can filter snips by a specific date range, helping you narrow down your search.
Re-using Past Snips
From the History window, you can perform various actions on any past snip:
- Open image: Double-click an entry or right-click and select "Open image" to view the full-size snip.
- Edit image: Right-click and choose "Edit image" to open the snip again in the ShareX image editor for further annotations or modifications.
- Copy image: Right-click and select "Copy image" to place the snip back onto your clipboard.
- Upload image: Right-click and select "Upload" to re-upload the snip to your configured image destination.
- Delete: Right-click and select "Delete" to remove the snip from your history and, optionally, from your local drive and upload destination.
This comprehensive history management ensures that no snip is ever truly lost and can be easily retrieved and reused, enhancing your productivity.
Where ShareX Goes Beyond a Basic Snipping Tool
While ShareX excels at the core functions of a snipping tool, its capabilities extend far beyond simple screen capture and annotation, offering a suite of features that significantly enhance workflow for Windows users.
Advanced Capture Modes
Beyond basic region and window snips, ShareX provides powerful capture options:
- Scrolling Capture: Capture entire web pages or long documents that extend beyond your screen's visible area, creating a single, continuous image.
- Screen Recording: Record video of your screen activity, with options for audio input. This is invaluable for creating tutorials, bug reports, or demonstrations. You can also record GIFs directly.
- OCR (Optical Character Recognition): Capture a region of text on your screen and have ShareX automatically convert it into editable text, which is then copied to your clipboard. This is extremely useful for extracting text from images or protected documents.
Automated After-Capture and After-Upload Tasks
ShareX's most powerful feature is its highly customizable workflow automation. After a snip is taken, and after it's uploaded (if applicable), ShareX can automatically perform a series of tasks. This eliminates manual steps and saves considerable time.
- After capture tasks:
- Copy image to clipboard
- Save image to file (with configurable file naming and folder structure)
- Open image in editor
- Open image in specified application
- Perform OCR
- Add image effects (e.g., watermarks, borders, shadows)
- After upload tasks:
- Copy URL to clipboard
- Shorten URL
- Show QR code for URL
- Open URL in browser
- Post URL to social media
This level of automation means you can configure ShareX to, for example, take a snip, automatically add a watermark, save it to a specific folder, upload it to a cloud service, and copy the shareable link to your clipboard—all with a single hotkey press.
Destinations and Custom Uploaders
ShareX supports a vast array of upload destinations for images, text, and files. This includes popular services and custom options:
- Image Uploaders: Imgur, Flickr, Dropbox, Google Photos, FTP, SFTP, and many more.
- Text Uploaders: Pastebin, Hastebin, etc.
- File Uploaders: Dropbox, Google Drive, OneDrive, FTP, SFTP, etc.
- Custom Uploader: For advanced users, ShareX allows you to configure custom uploaders to nearly any web service using HTTP requests, giving you unparalleled flexibility.
This extensive destination support ensures that your snips and other captures can be seamlessly integrated into your existing workflows and shared instantly with colleagues or friends.
Tools and Utilities
ShareX includes a suite of handy tools that complement its core capture functions:
- Color Picker: Easily grab color codes from any pixel on your screen.
- Screen Ruler: Measure dimensions and distances on your screen.
- Image Combiner: Combine multiple images into a single one.
- Video Converter: Convert video files or create GIFs from video.
- QR Code: Generate or decode QR codes.
- Image Thumbnailer: Create thumbnails for a batch of images.
These integrated tools reduce the need for separate utilities, making ShareX a comprehensive productivity hub for managing screen content.
Frequently Asked Questions
Can ShareX replace the built-in Snipping Tool on Windows?
Yes, ShareX can fully replace and significantly enhance the functionality of the built-in Windows Snipping Tool. It offers more capture modes, powerful annotation tools, extensive automation features, and various upload destinations, making it a more versatile and efficient choice for screen capture needs.
How do I make ShareX capture a specific window?
To capture a specific window, open the ShareX main window, click on the "Capture" menu, and select "Capture window." Your cursor will change, and you can then click on the window you wish to capture. ShareX will automatically snip the entire content of that window.
Can I save my snips automatically to a folder?
Absolutely. In the ShareX main window, go to "Task settings," then "After capture tasks," and ensure "Save image to file" is checked. You can configure the default folder and file naming patterns under "Application settings" > "Path."
Does ShareX allow me to annotate my snips?
Yes, ShareX includes a robust built-in image editor. You can configure ShareX to automatically open the editor after each capture by enabling "Open image in editor" in the "After capture tasks." The editor provides tools for drawing, adding text, blurring, highlighting, and more.
Is ShareX free to use?
Yes, ShareX is completely free and open-source software. There are no hidden costs, subscriptions, or feature limitations behind a paywall. You can download and use all its features without any charge.
Get ShareX for Windows
ShareX is free and open source. Install it, then come back and try the steps above.
Download ShareX