ShareX on Windows 10
Setup notes, capture quirks, and a stable configuration for ShareX on Windows 10 machines.
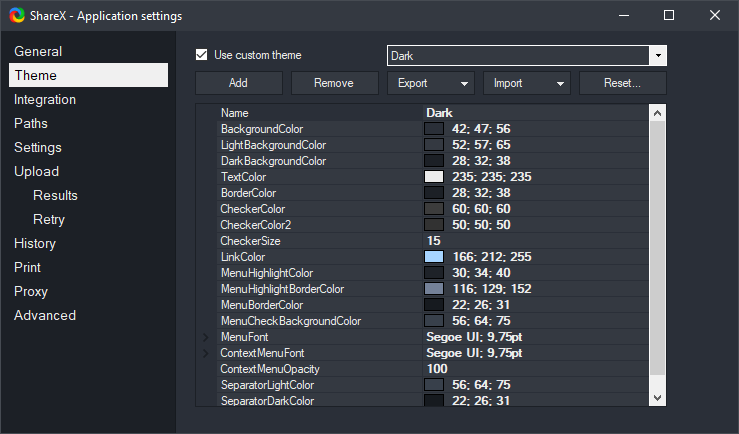
ShareX is a powerful and free open-source screen capture tool designed specifically for Windows users. It offers a wide array of features for capturing, annotating, and sharing screenshots and screen recordings. This guide focuses on optimizing your experience with ShareX on Windows 10, addressing common considerations and providing practical advice for this specific operating system environment. Whether you're new to ShareX or a long-time user, understanding the nuances of how it interacts with Windows 10 can help you achieve more efficient workflows and troubleshoot potential issues. We'll cover everything from initial installation to advanced configuration tips tailored for the Windows 10 platform.
Installing ShareX on Windows 10
Installing ShareX on Windows 10 is straightforward. You have two primary methods: using the installer or downloading the portable version. Both are available from the official ShareX website.
Using the Installer
The installer is the recommended method for most users as it integrates ShareX seamlessly with your Windows 10 system, creating desktop shortcuts, Start Menu entries, and handling file associations.
- Open your web browser and navigate to the official ShareX website to download ShareX for Windows.
- Locate and click the "Download" button to get the latest installer executable.
- Once the download is complete, run the installer file.
- Follow the on-screen prompts. You will typically be asked to accept the license agreement, choose an installation directory (the default is usually fine), and decide whether to create a desktop shortcut.
- Click "Install" to begin the installation process.
- After installation, ShareX will typically launch automatically, and an icon will appear in your system tray.
The installer ensures all necessary components are correctly placed and registered, providing the most integrated experience for ShareX screenshot software.
Using the Portable Version
The portable version of ShareX does not require installation. It can be run directly from a folder, USB drive, or network share. This is ideal if you prefer not to install software or need to use ShareX on multiple Windows 10 machines without leaving traces.
- Navigate to the official ShareX website and download ShareX for Windows.
- Look for the "Portable" download option, usually provided as a .zip archive.
- Download the .zip file to your desired location (e.g., your Downloads folder, a USB drive).
- Extract the contents of the .zip file to a new folder.
- Navigate into the newly created folder and locate the
ShareX.exeexecutable. - Double-click
ShareX.exeto launch ShareX.
Keep in mind that the portable version will not automatically integrate with your system's Start Menu or file associations, and you may need to manually create shortcuts if desired. All configurations and history will be stored within the portable folder.
Setup vs Portable on Older Machines
When deploying ShareX on older Windows 10 machines, the choice between the installer and portable version can sometimes impact performance or ease of management. For machines with limited disk space or those where you prefer minimal system changes, the portable version can be advantageous. It doesn't write to the registry extensively or scatter files across various system directories. This makes it easier to manage and remove, as all its files are contained within one folder. However, for features like automatic startup with Windows, you might need to manually configure it (e.g., by placing a shortcut in the Startup folder) if using the portable version. The installer version, while offering deeper system integration, might be slightly slower to install on very old or resource-constrained Windows 10 systems due to the overhead of writing registry entries and copying files to system folders. However, once installed, its performance is generally identical to the portable version. The key difference lies in the initial setup and how deeply ShareX integrates with the operating system. If system-wide hotkeys and automatic updates are important, the installer is usually preferred, even on older hardware, as the performance impact of the installation process itself is negligible after the initial setup.
Hotkeys and the Print Screen Key
Windows 10 has evolved its handling of the Print Screen key over time. ShareX offers robust hotkey customization, allowing you to tailor your capture workflow, including how the Print Screen key behaves.
Default Windows 10 Print Screen Behavior
By default, pressing the
Print Screenkey on Windows 10 copies the entire screen to the clipboard. Pressing
Alt+
Print Screencopies the active window. Newer versions of Windows 10 introduced an optional setting that makes the
Print Screenkey open the Snip & Sketch tool instead.
Configuring ShareX to Use Print Screen
ShareX can override the default Windows 10 Print Screen behavior, allowing you to assign it to any of ShareX's capture functions.
- Launch ShareX.
- From the main window, click "Hotkey settings".
- In the Hotkey settings window, you'll see a list of predefined hotkeys. You can edit an existing entry or add a new one.
- To assign Print Screen to a specific capture task, click "Add".
- In the "Hotkey" field, press the Print Screen key. ShareX will register it.
- In the "Task" dropdown, select the desired capture action, such as "Capture region", "Capture active window", or "Capture fullscreen".
- You can further customize "After capture tasks" and "After upload tasks" for this specific hotkey.
- Click "Close" to save your hotkey settings.
After this, pressing
Print Screenwill trigger the ShareX action you assigned, overriding any Windows 10 default behavior. If you experience issues, ensure that the Windows 10 setting for Print Screen opening Snip & Sketch is disabled (Settings > Ease of Access > Keyboard > Print Screen shortcut).
Display Scaling and Mixed-DPI Monitors
Windows 10's handling of display scaling, especially with mixed-DPI monitor setups, can sometimes introduce quirks with screen capture tools. ShareX is designed to work well in these environments, but understanding potential issues can help.
High DPI Scaling
On high-DPI displays (e.g., 4K monitors), Windows 10 scales the user interface to ensure text and elements remain readable. ShareX generally respects these scaling settings, allowing for accurate captures even when your display is scaled to 150%, 200%, or more. However, if you notice captures appearing blurry or incorrectly sized, especially after changing display settings or moving ShareX between monitors, ensure that ShareX's compatibility settings are not overriding Windows' scaling. To check ShareX's compatibility settings:
- Right-click on the ShareX executable (
ShareX.exe) or its shortcut. - Select "Properties".
- Go to the "Compatibility" tab.
- Click "Change high DPI settings".
- Ensure that "Override high DPI scaling behavior" is unchecked, or set "Scaling performed by:" to "Application" if you experience issues. Usually, letting Windows handle it ("Application" or unchecked) is best.
Mixed-DPI Monitor Setups
When using multiple monitors with different scaling factors (e.g., a laptop screen at 150% and an external monitor at 100%), ShareX typically handles captures across these displays correctly. However, sometimes issues can arise where the captured image from one monitor appears to be scaled incorrectly or shifted. If you encounter such issues:
- Restart ShareX: Sometimes, simply restarting ShareX after connecting or disconnecting monitors, or after changing display scaling settings, can resolve synchronization issues.
- Update Display Drivers: Ensure your graphics card drivers are up to date. Outdated drivers are a common cause of display-related glitches.
- Region Capture: If full-screen captures are problematic, using "Capture region" and manually selecting the area might offer more consistent results.
- Task settings: Review your capture settings reference within ShareX under "Task settings" > "Capture" to ensure no specific options are interfering with scaling. For example, "Fixed region capture" or "Pixelated region capture" might behave unexpectedly if scaling is inconsistent.
Capture Quirks on Older Windows 10 Builds
While ShareX is continuously updated to work with the latest Windows 10 versions, users on older or un-updated Windows 10 builds might encounter specific capture quirks. These are often related to changes in how Windows handles graphics APIs or specific UI elements.
Transparent Windows and Aero Effects
On some older Windows 10 builds, especially those prior to significant visual updates, capturing windows with transparency (like some modern UWP apps or parts of the Start Menu) might result in the transparent areas appearing black or solid white in the screenshot. ShareX generally tries to render these correctly, but the underlying Windows API behavior can vary.
UWP App Captures
Universal Windows Platform (UWP) applications (like the Windows Store, Settings app, or Mail app) sometimes behave differently during capture compared to traditional desktop applications. On very old Windows 10 builds, you might find:
- Incorrect window boundaries: When using "Capture active window", the captured area might include shadows or exclude parts of the window frame incorrectly.
- Blank captures: In rare cases, a UWP app might appear as a blank white or black rectangle in the screenshot, especially if it's playing protected content or using specific rendering techniques.
These issues are largely mitigated in newer Windows 10 versions and with updated ShareX releases. If you experience persistent problems, consider updating your Windows 10 build or using "Capture region" as a workaround.
Game Bar Interference
Older Windows 10 builds might have the Xbox Game Bar (or its predecessors) more aggressively integrated, which can sometimes conflict with other screen capture tools. If you find ShareX captures failing or behaving erratically during gaming, try disabling the Game Bar features in Windows Settings (Settings > Gaming > Xbox Game Bar). For the best experience, it's always recommended to keep your Windows 10 installation updated to the latest available feature release and security patches. This ensures compatibility with modern applications like ShareX and avoids many of these older quirks. For notes specific to the successor OS, refer to
Windows 11 specific notes.
A Low-Overhead Configuration
ShareX is designed to be efficient, but for users on older or resource-constrained Windows 10 machines, optimizing its configuration can further reduce its footprint and ensure smooth operation. A low-overhead setup focuses on minimizing background processes, visual effects, and unnecessary tasks.
Disable Unused After Capture/Upload Tasks
Every task ShareX performs after a capture or upload consumes resources. If you don't need certain actions, disable them.
- Open ShareX.
- Click "After capture tasks" in the main window.
- Uncheck any tasks you don't frequently use, such as "Open image in editor", "Copy image to clipboard", "Save image to file", "Upload image", "Perform actions", "Show quick menu", etc. For minimal overhead, consider only "Copy image to clipboard" or "Save image to file".
- Similarly, click "After upload tasks" and uncheck anything unnecessary, especially "Open URL", "Shorten URL", or "Show notification".
This is one of the most impactful changes for reducing immediate post-capture resource usage.
Simplify Image Effects
Image effects, while powerful, add processing time and CPU cycles.
- In ShareX, click "Task settings".
- Go to "Image" > "Effects".
- In the "Image effects configuration" window, review the list of active effects.
- Remove any effects you don't regularly use (e.g., watermarks, borders, shadows, pixelation) by selecting them and clicking the "Remove" button.
- If you use effects, keep them simple. Complex effects chains will take longer to process.
Minimize History and Cache
ShareX stores a history of your captures and uploads. While useful, a very large history can consume disk space and slightly impact startup time.
- Click "Application settings" in ShareX.
- Go to "History".
- Adjust "Max image history items" to a lower number if you don't need a very long record.
- Consider regularly clearing your image history via "Tools" > "Image history" > "Clear history".
Disable Automatic Updates (with caution)
While keeping ShareX updated is generally recommended for security and features, automatic checks can consume a small amount of network and CPU resources. If you're on a very restrictive system, you can disable this.
- Click "Application settings" in ShareX.
- Go to "Advanced".
- Uncheck "Check for updates at startup".
Remember to manually check for updates periodically if you disable this.
Use Simple Capture Methods
Avoid complex capture methods like scrolling capture or GIF recording if performance is critical, as these are more resource-intensive. Stick to basic region, window, or fullscreen captures. For a complete overview of all capture types, you can consult
the full ShareX walkthrough. By implementing these configurations, you can ensure ShareX remains a lightweight and responsive tool even on older Windows 10 hardware, allowing you to capture quickly without bogging down your system.
Frequently Asked Questions
Can ShareX record screen video on Windows 10?
Yes, ShareX can record screen video on Windows 10. It uses FFmpeg, an open-source multimedia framework, for both screen recording and GIF recording. You can configure the video source, codecs, and output format within ShareX's "Task settings" under "Capture" > "Screen recorder".
Is ShareX compatible with all versions of Windows 10?
ShareX is designed to be compatible with most modern versions of Windows 10. While it generally works across all builds, the best experience is on fully updated versions. Older Windows 10 builds might exhibit minor display or capture quirks, as detailed in the "Capture Quirks on Older Windows 10 Builds" section.
How do I make ShareX start automatically with Windows 10?
To have ShareX start automatically when Windows 10 boots, open ShareX and go to "Application settings" > "General". Check the option "Run ShareX when Windows starts". If you are using the portable version, you might need to manually place a shortcut to
ShareX.exein your Windows Startup folder (
shell:startup).
Why are my captures blurry on a high-resolution Windows 10 monitor?
Blurry captures on high-resolution monitors are often related to display scaling settings. Ensure that ShareX's compatibility settings are not overriding Windows' DPI scaling, or try restarting ShareX after changing display settings. Verify your graphics drivers are up to date.
Can ShareX replace the built-in Windows 10 snipping tool?
Yes, ShareX can fully replace the built-in Windows 10 Snipping Tool or Snip & Sketch. ShareX offers a much wider range of capture options, annotation tools, and after-capture workflows. You can assign the Print Screen key to a ShareX capture function to seamlessly integrate it into your workflow, effectively replacing the default Windows tools.
Get ShareX for Windows
ShareX is free and open source. Install it, then come back and try the steps above.
Download ShareX